There is a new type of telescope just being introduced over the past several years – the “Smart” telescope, which is an integrated solution to astronomy for beginners and experienced astro imagers alike. These scope are characterized by having all of the elements needed to be able to acquire images from the moon, the sun, and various deep sky objects. The package has a mount, camera, tripod, and controllers all in one simple to use unit.
Of the several smart scopes now available, I selected the ZWO Seestar S50 to give this new technology a try.

The S50 has several features and attributes that I found compelling:
- Price – at this time the S50 is just $575. “Just” you say! Well, a similar system of individual parts would cost several times that much.
- Auto live stacking or planned imaging.
- Saves individual raw frames for later processing – PC connection for download.
- Auto “GoTo”, with plate solve verification.
- Extensive library of celestial objects.
- Tracking with sidereal, lunar and solar rates automatically selected.
- Equatorial or Alt/Az modes.
- Auto focus.
- Built-in filters for nebula and IR.
- F/5 lens – reasonably fast for short exposures.
- Wide field of view
- Control with phone or iPad through WiFi/Bluetooth.
- Very portable.
- Automated setup and calibration in either AltAz or EQ modes.
There are a few drawbacks as well:
- Limited control of individual functions and parameters compared to ZWO ASIair.
- Small aperture lens 50mm.
- 250mm FL – not suitable for planetary imaging.
- Image size only about 2MP.
- WiFi range limited to <10M.
- No PC app for control.
- Requires a separate mount or wedge adapter for EQ mode.
- AltAZ mode exposures limited to 10sec to avoid rotation problems. EQ enables longer exposures.
Since I wanted the benefits of an EQ mount, some improvisation was necessary. I had an old entry level Celestron EQ scope that was just sitting idle, so I did some modifications.
First, since I only need the mount’s altitude adjustment, the Dec axis was removed. The RA adjustment gear was also removed and the attachment of the S50 was fixed in place. A new adapter plate to mount the S50 was designed and 3D printed, including an offset so the S50 GG was moved to allow better weight distribution. The mount only had coarse adjustments for altitude and Azimuth, so these were added as well.
For fine altitude adjustment, a tripod leveler was attached between the S50 and the adapter plate. once the local latitude was set roughly, the S50 polar align routine was completed using the leveler plate. Only the adjuster in line with the RA axis was used.
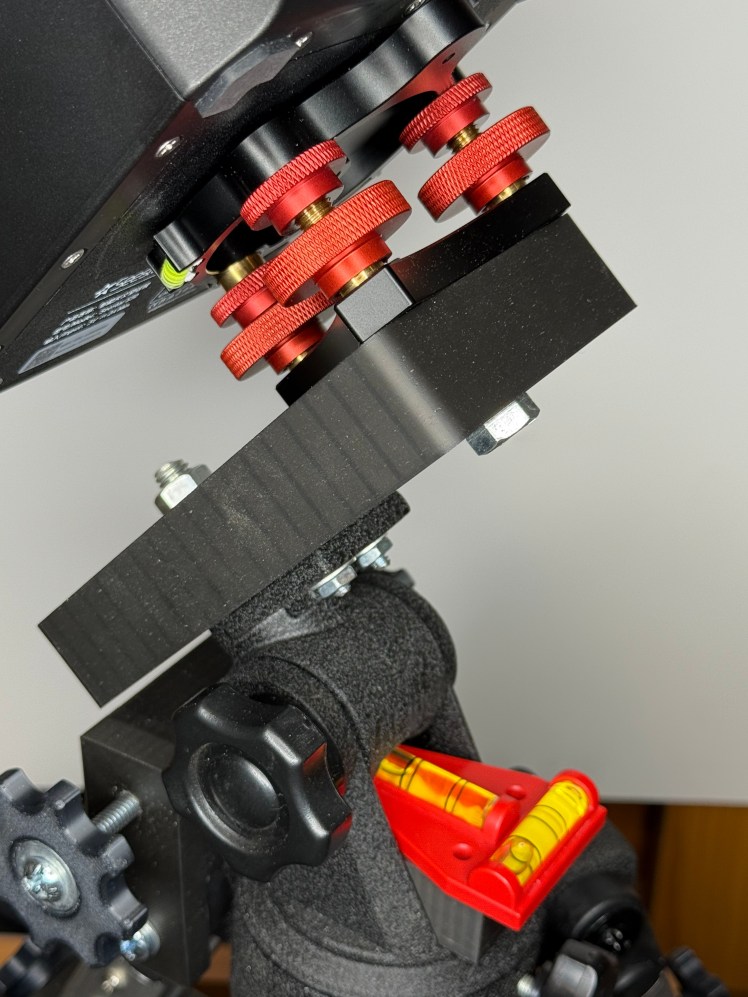
S50 adapter and altitude leveler
Fine azimuth adjustment was added by fabricating an adapter that has two horizontal adjustment screws similar to the mechanism used on most EQ mounts. A follower arm was attached the mount which is moved by the two adjustment screws. Several degrees of motion is possible with this arrangement.
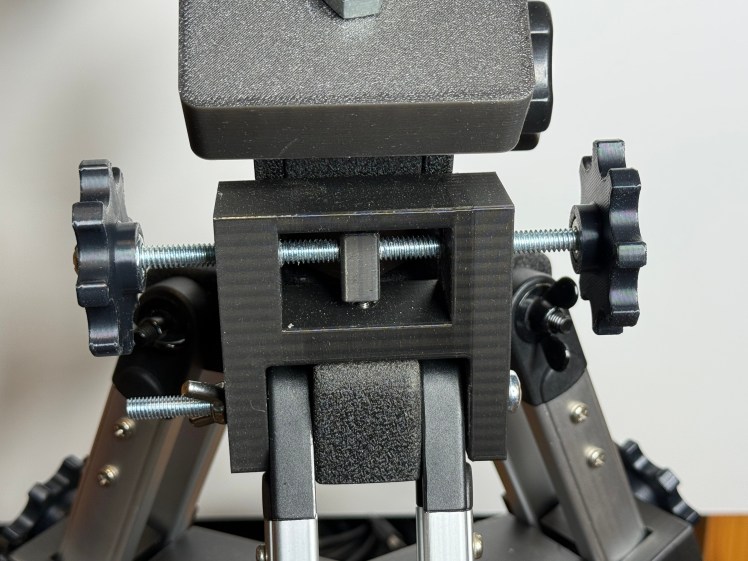
Azimuth/ Latitude fine adjuster
The tripod itself was not particularly sturdy mainly because the legs could not be tightened sufficently and the existing spreade was very weak. A new triangular spreader was added to fix the tripod legs in place. This made a considerable difference in the rigidity of the mount.
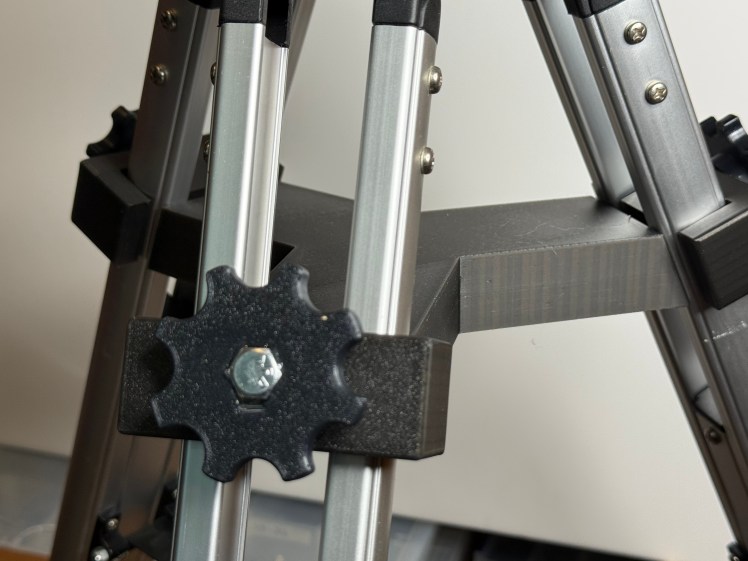
Tripod spreader
Finally, to make initial tripod leveling easier, a bubble level was added and leveling feet were fabricated.
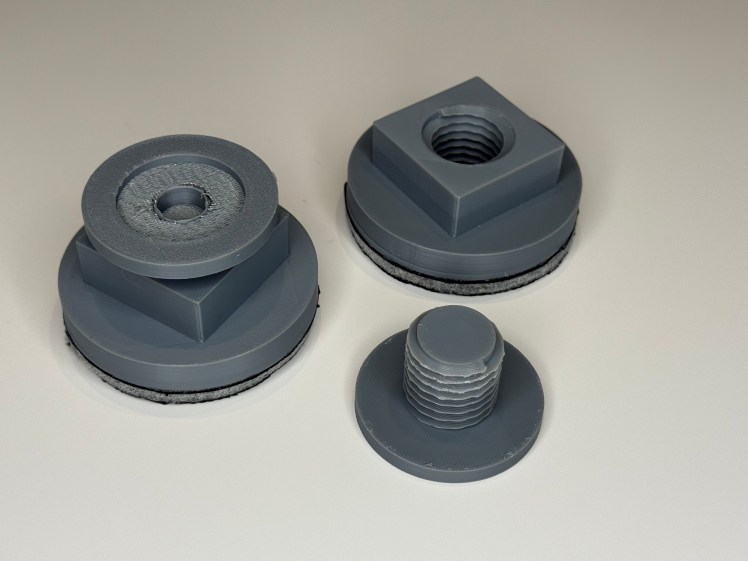
Leveling feed with anti vibration pads.
The top of the leveler screws into the base. The top is turned to raise and lower the tripod leg. About 1/2 inch of vertical travel on each leg is possible

Leg adjuster in place. The anti-vibration pad on the bottom has a rubber anti-skid surface. With these in place the trpod stays put in place. For added stability a weight is placed on the existing spreader.
First light
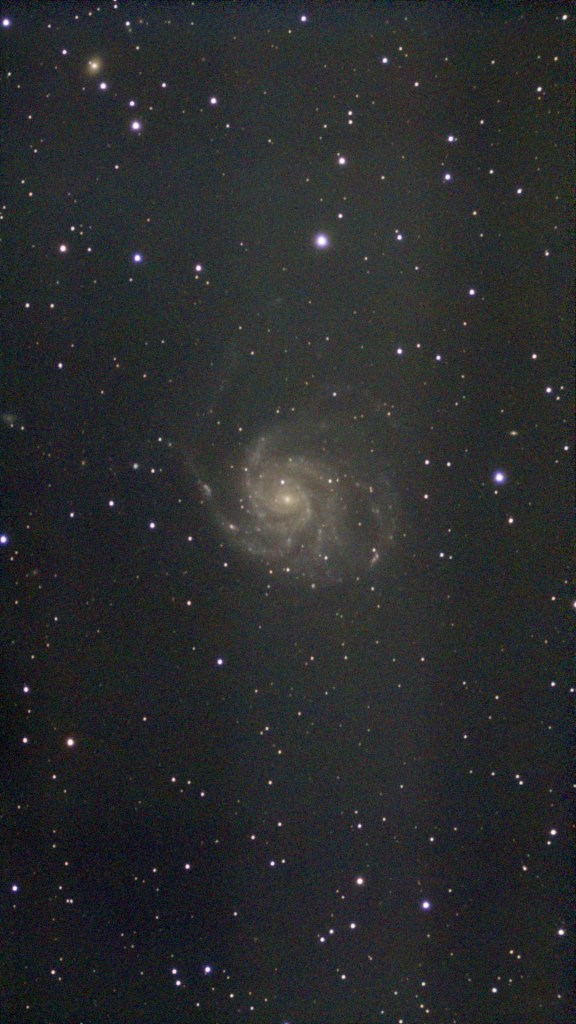
While getting the EQ mount ready, I took some images in the AltAz mode at 10 sec each. While these turned out well, taking longer individual subs minimizes the noise on each frame by moving the fainter portions away from the lower limit. The EQ mode allows 30 second exposures, once the S50 is polar aligned. Tracking was excellent, as demonstrated by the nice round stars in the 3.25 hour total exposure of M101.
All of the following images were post processed, unless otherwise noted. The subs were normalized, aligned, stacked and stretched in Astro Pixel Processor, finished and sharpened in Photoshop.
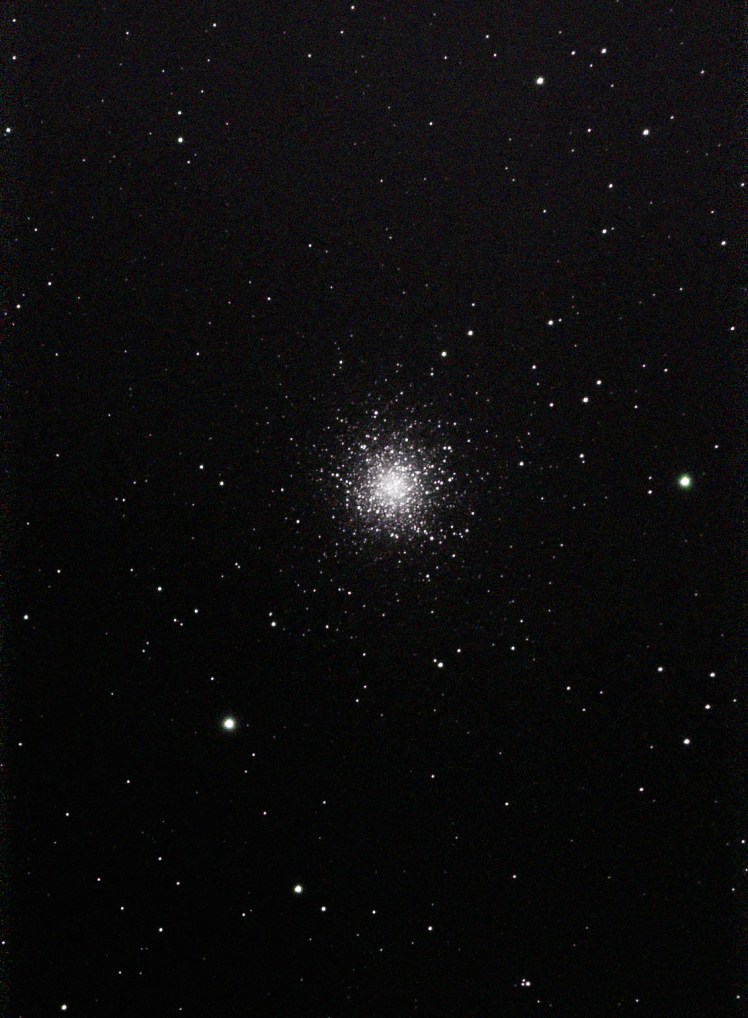
M3
13 subs at 10 sec each. AltAz mode
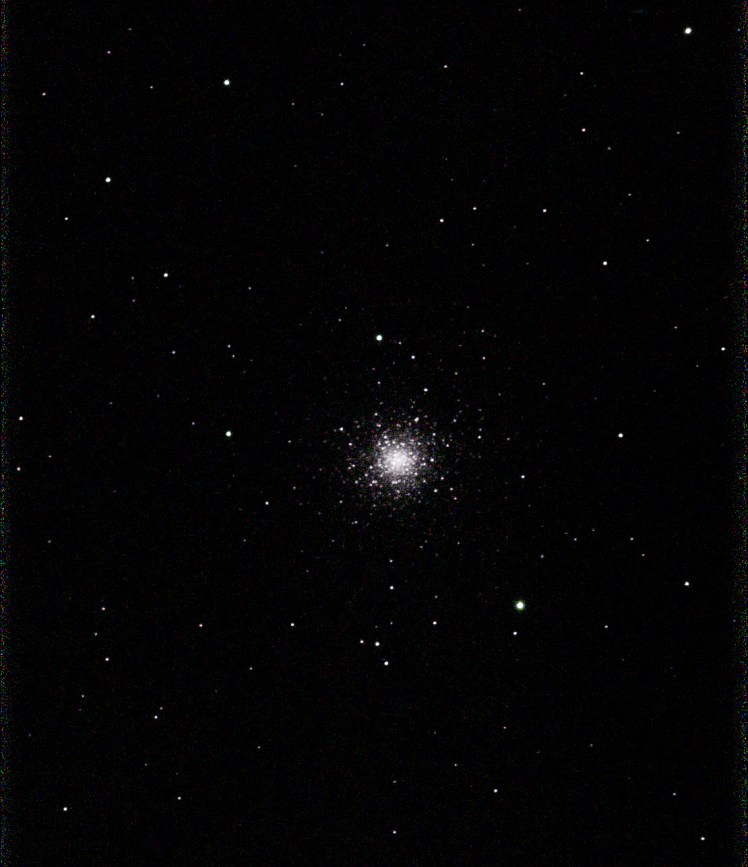
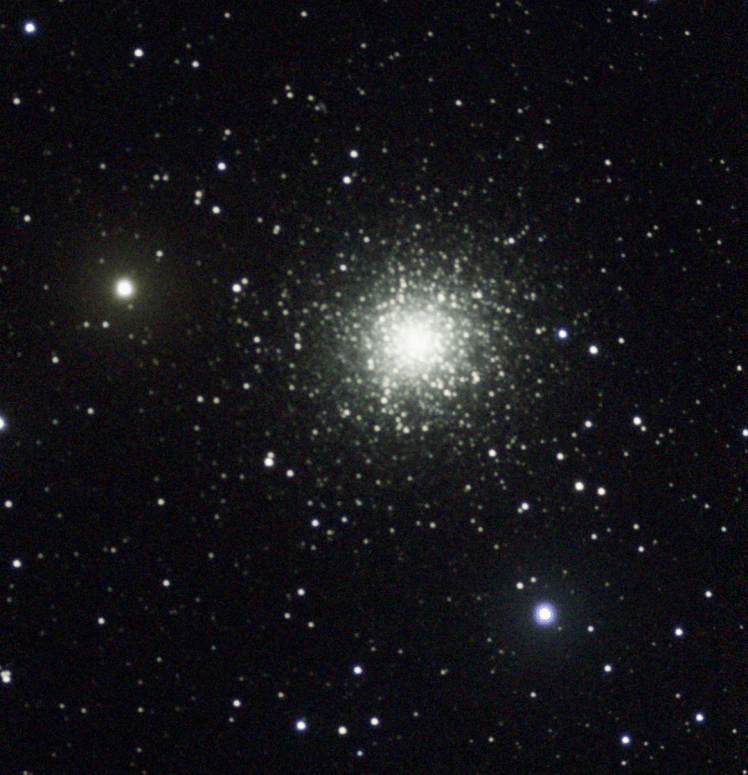
M13
S50 45 subs at 10 sec each, AltAz mode
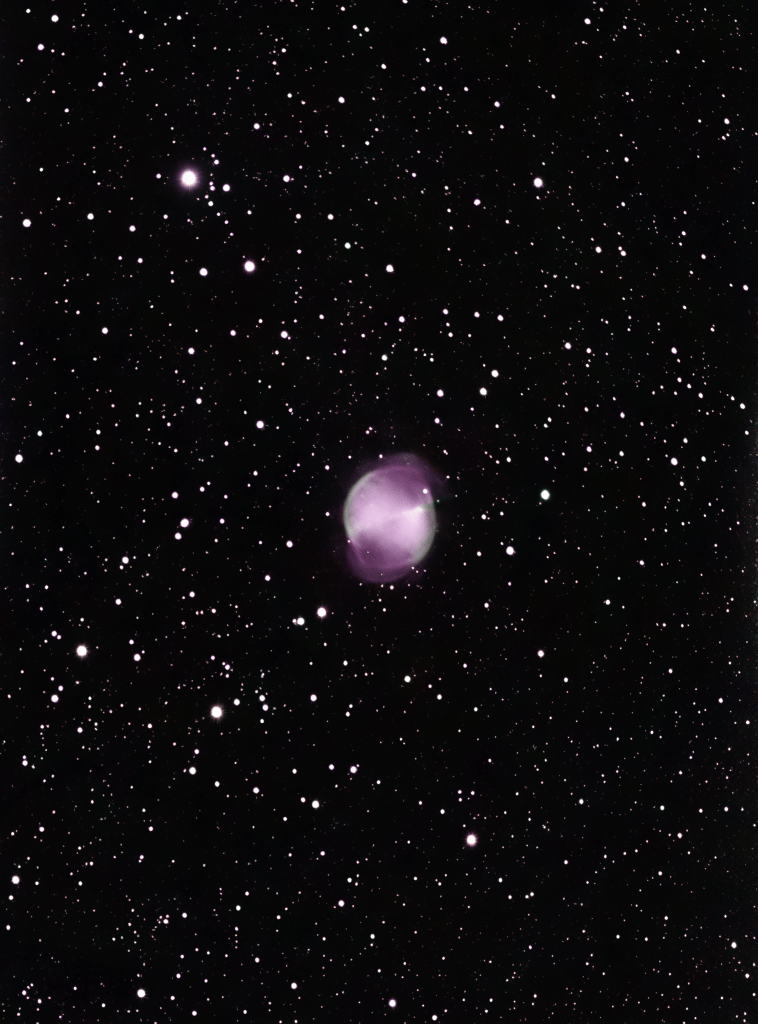
M27
S50
350 subs @ 10sec Processed Astro Pixel & Photoshop
Once the EQ system was complete some longer exposure images were acquired. The next available semi-clear night was with an 80% full moon, so conditions were less than ideal. Not withstanding that, I got some reasonably decent results, as shown by the M101 processed image.
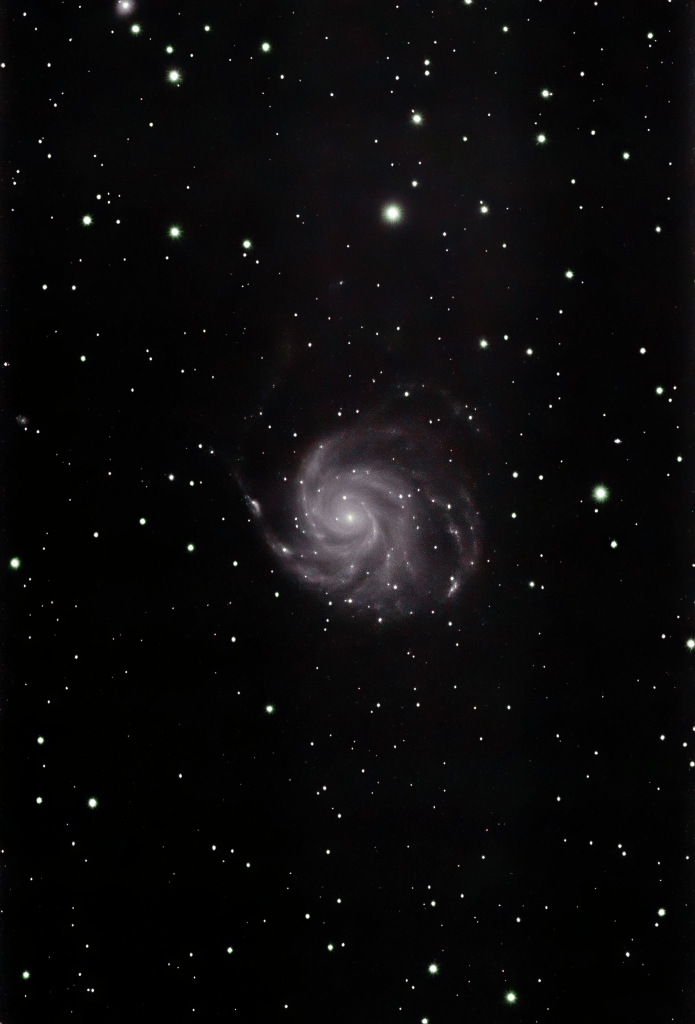
M101
S50 3.25 hr @ 30sec ea
EQ Mode
S50 in Live mode creates a stacked image in real time. This is shown in the next image, without any additional processing. Not bad, but post-processing definitely improves the image.
M101
S50 Stacked image – no additional processing. Note the increased noise and lower contrast compared to the processed image.

NGC7000
Composite of two Seestar 50 images.

NGC 281 The Pacman Nebula
S50 Operational Proceedure
Setup
While it is still light, the mount is leveled and coarse adjusted to true north using an iPhone compass app called Sun Surveyor. At my location te true North magnetic deviation is about 3 degrees, so this is set as well.
When dark arrives, the S50 polar align procedure is begun. the mount position is fin adjusted using the altitude and azimuth adjustments. Once the S50 signals success, imaging can begin.
Select the exposure time and filter, if appropriate and go to the object library for the next step.
Imaging
Imaging is very simple. Just select a suitable object from the library and GoTo. Once the object’s location is verified by means of a plate solve or two, imaging will begin. The live view stack will be shown and the progress noted with a readout of the integration time and number of stacked images. Bad images will be rejected automatically. If selected, the individual raw subs are saved as the stacking proceeds.
The whole process is very straight forward and quite easy. I plan to use the S50 as a second imager, while I operate my other, larger scope for higher resolution images.
More Images
in addition to the DSO show above I took some sun images using the supplied sun filter. Initially finding the sun took a bit of time, since the scope was not completely polar aligned. The S50 does have a sun finder routine, which takes a good bit of time to execute if the initial position is not close. By manually finding the sun with a simple fun finder the process was much faster. A couple of solar images are shown below.
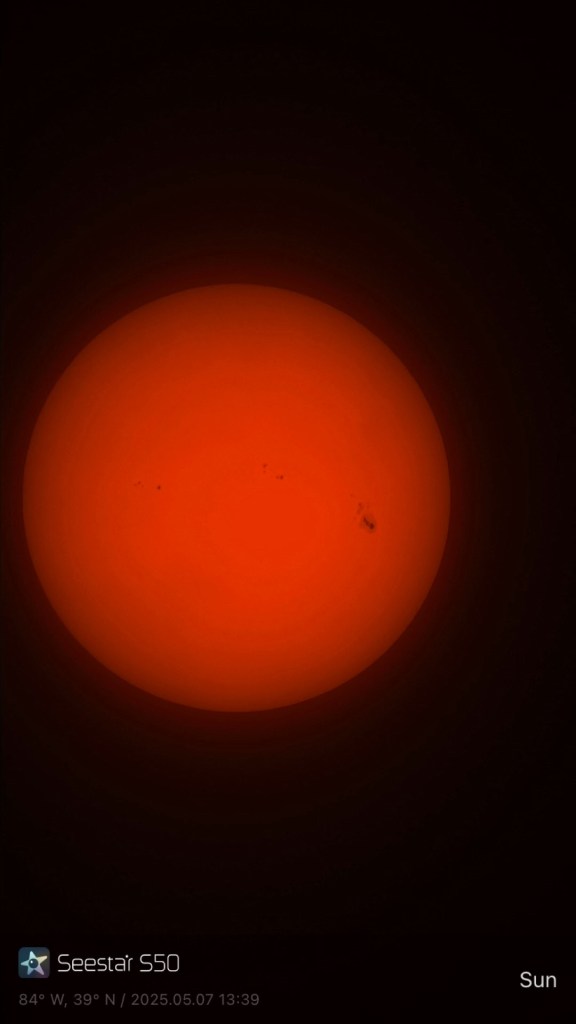
Sun S50
5/7/25
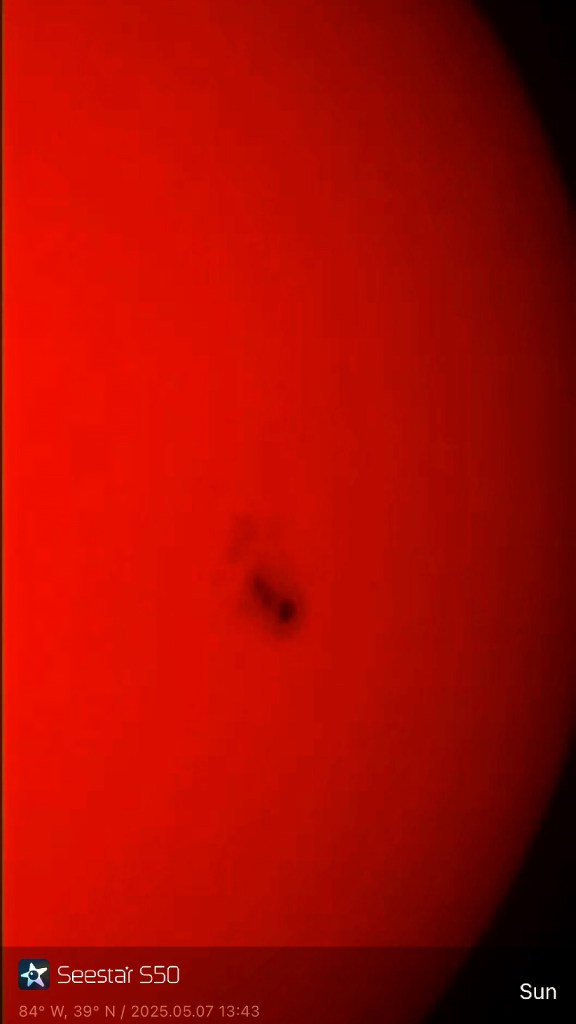
Sun S50 4x image, showing large sunspot
5/7/25
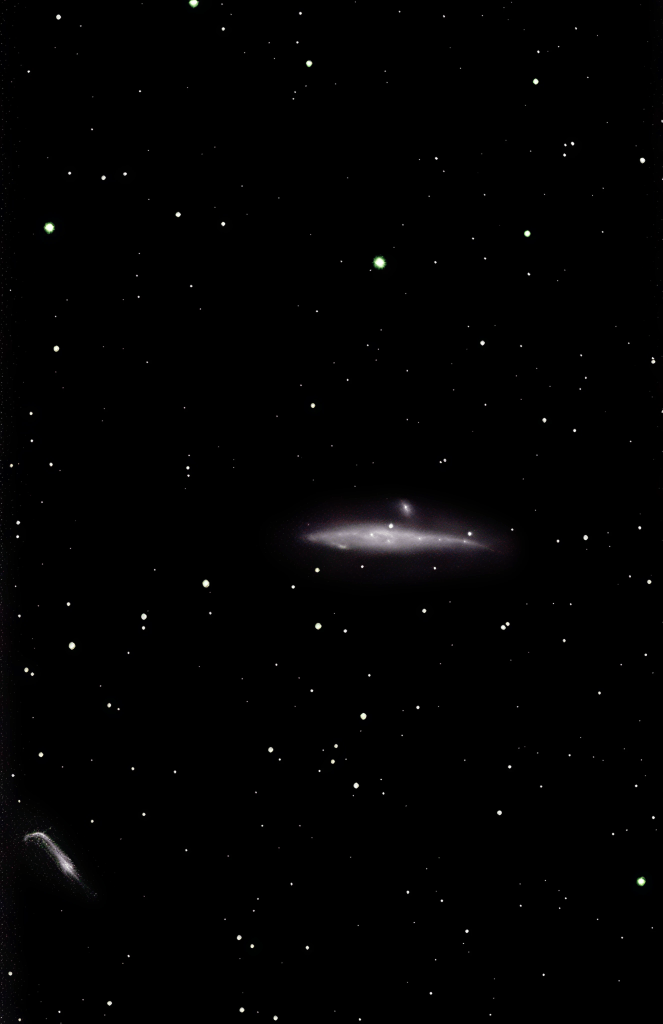
NGC 4631 – 2.2 hours total exposure
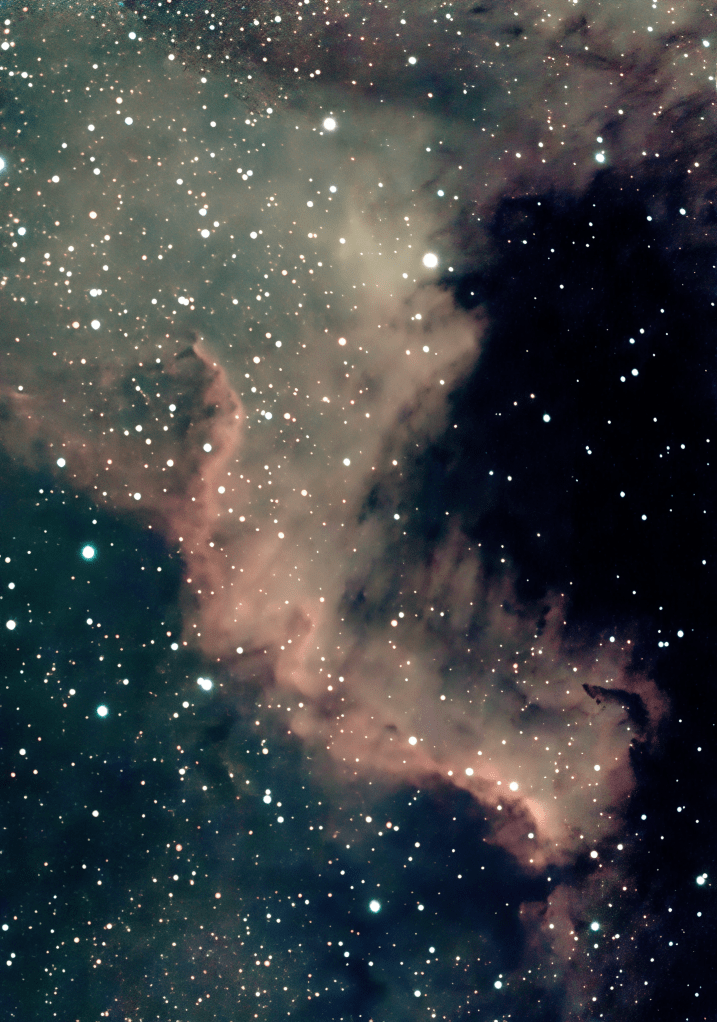
NGC7000 NA Nebula
Composite of two image sessions
#1: 05-26-2025 @ JGAP site and #2: 06-03-2025 @ home
Processed in API and PS
Image stats #1: 64subs @ 30′ ea., #2: 285 subs @ 30″ ea., combined in PS
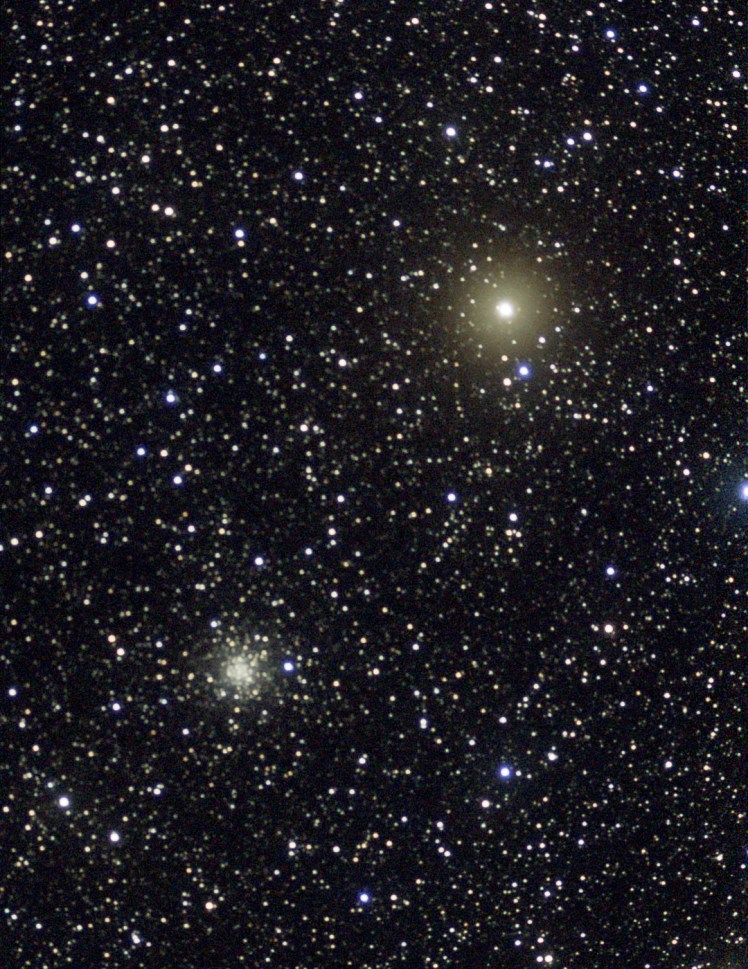
M56 and red giant

NGC 6946
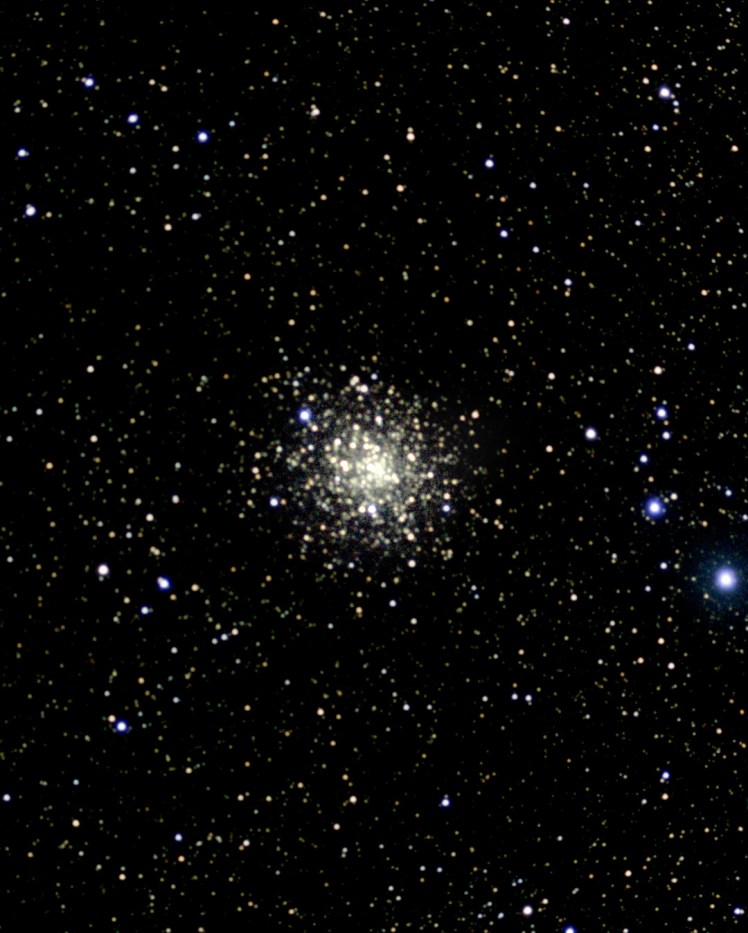
M71 Globular Cluster
M13 Globular Cluster
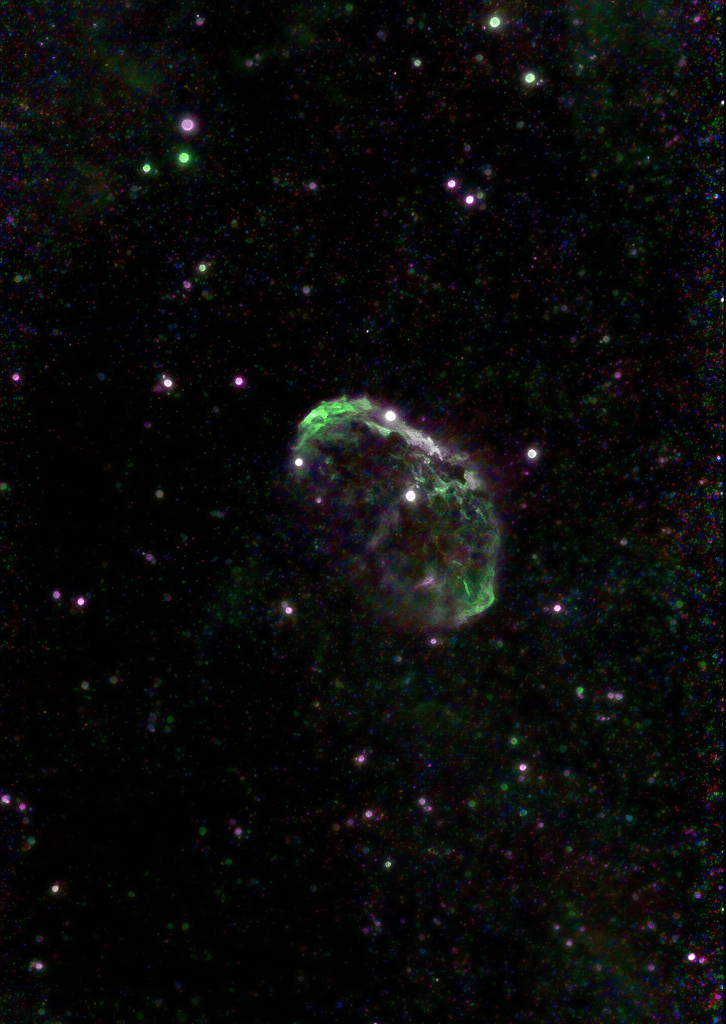
NGC 6888 Crescent Nebula
Seestar S50 180 minutes, LP filter
