After upgrading my mount to the ZWO AM5N, I found that the Kendrick Dew Heater Controller was no longer functioning. Rather than just replacing it I went looking for a DIY solution, which I found at Really easy to make arduino dew heater controller – IceInSpace
The controller described in the post uses an Arduino Nano and a small OLED display. Up to three separate channel may be used, each of which is controlled by the Nano. Basically, there is an ambient temperature and humidity sensor to enable determination of the current dewpoint. Each heater channel has a calibrated temperature sensor MOSFET driver to connect to the resistive heat tape. The channel temp sensor is attached to the scope near the glass surface. When the glass surface temp reading is within (above) about 5 deg of the dewpoint, the heater strap is energized. The closer the glass temp is to the dew point, the higher the drive to the heater. The drive control from the Nano is by means of a PWM (pulse width modulated) signal. The advantage of this approach is a saving of power consumed by the device. Well above the dew point the Dew heater system draws virtually no power.
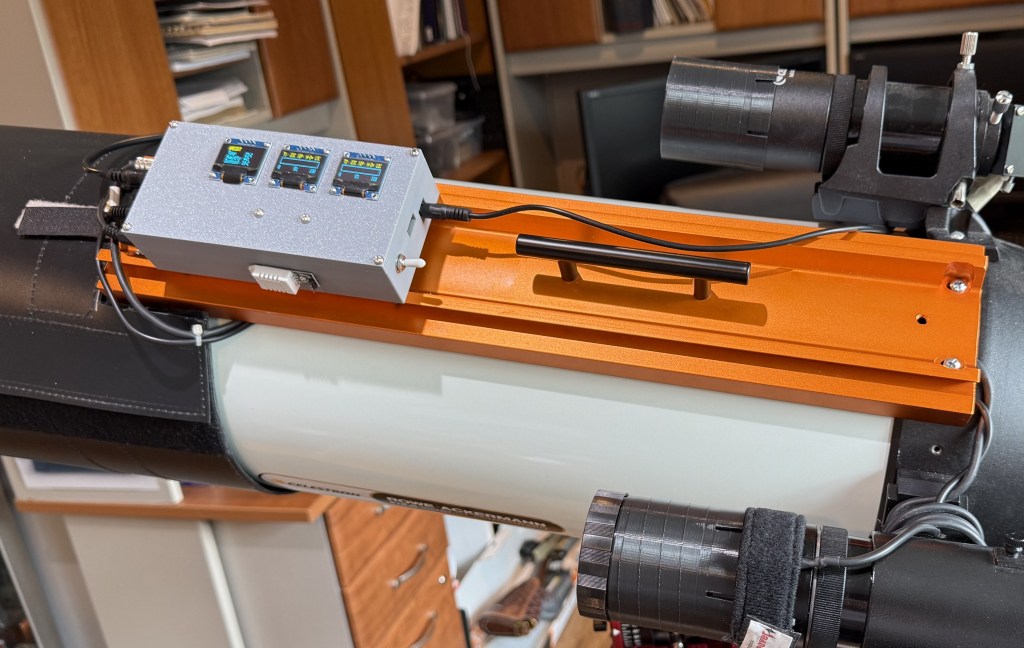
Dew Heater Controller mounted on RASA8 top rail
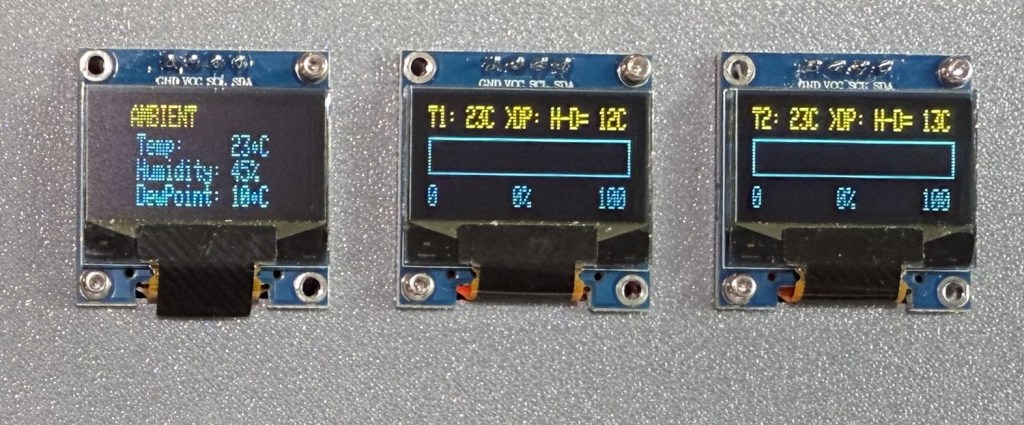
Dew Heater Controller Displays
Everything is fully automatic, but the status of the individual channel and the ambient conditions are available to see on the attached OLED display. The original version alternated between the channel status and the ambient conditions. In my version, there are three displays, one for each channel and one for the ambient temperature and humidity. The displays are inexpensive and consume very little power, so why not use more?
The Celestron RASA8 has a nice available dew heater ring, which is fully compatible with this controller.
Modifications
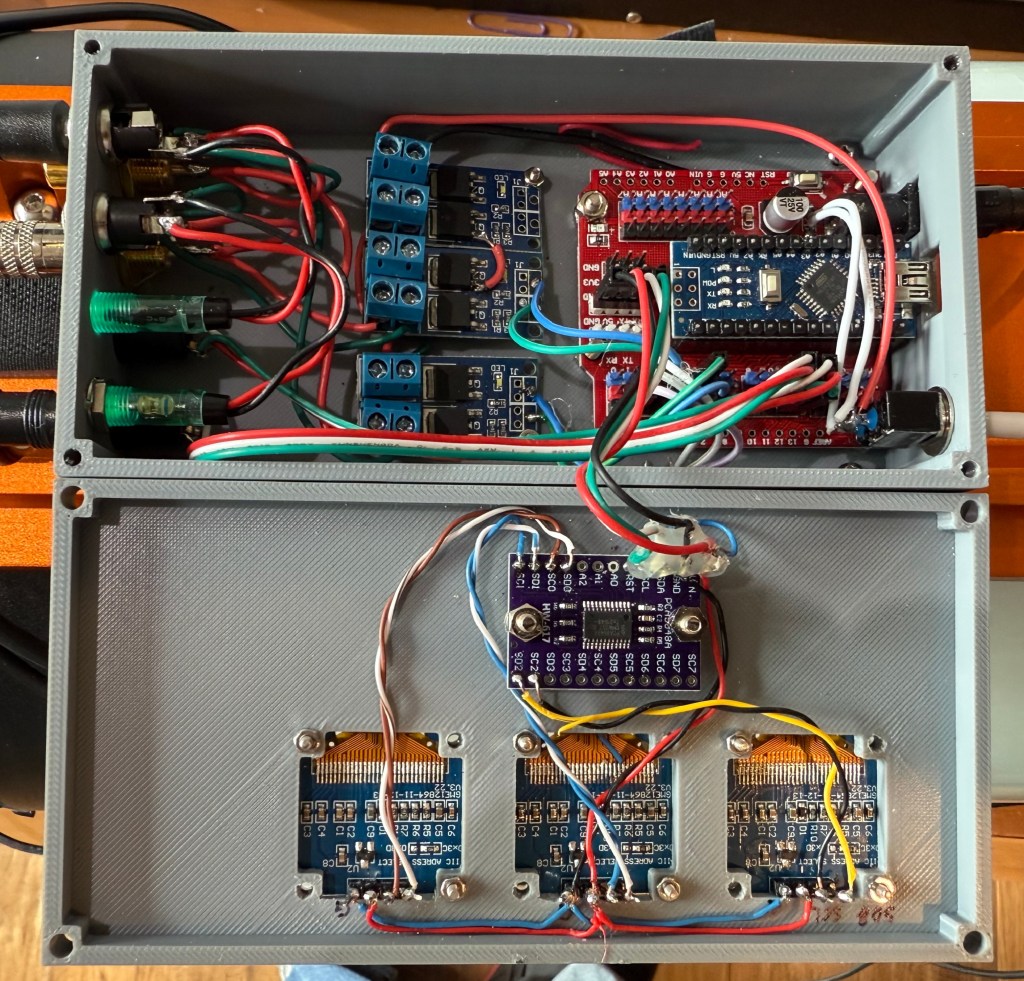
The primary change to the hardware was to add an I2C multiplexer and two additional displays. the controller block diagram is show below. Note that the second heater and sensor connection are just like the first. The accompanying table has all of the Nano connections. Please refer to the original post on IceInSpace for full directions. My code for these modifications are contained in the accompanying page. Just copy and paste the code into the Arduino IDE.

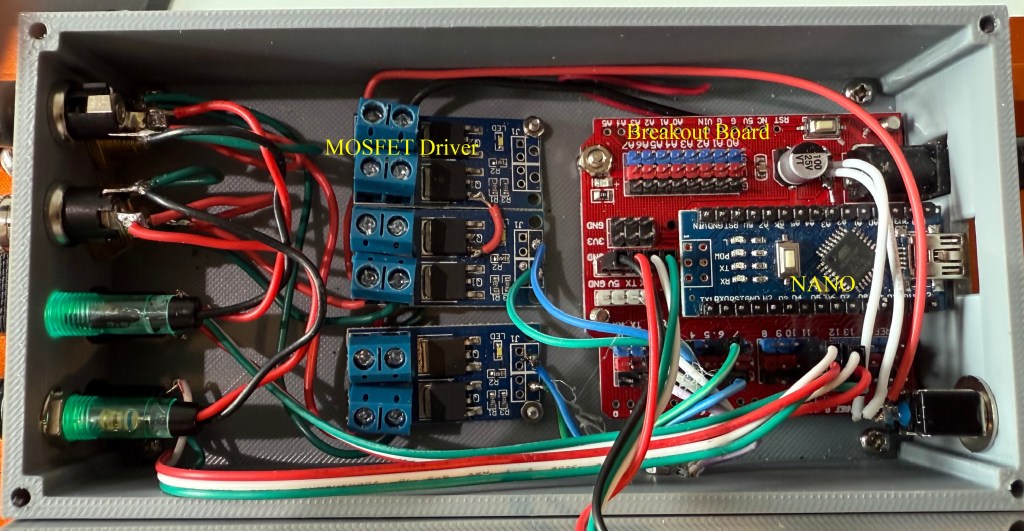
Dew Heater Controller Wiring
Components in Custom 3D printed Case
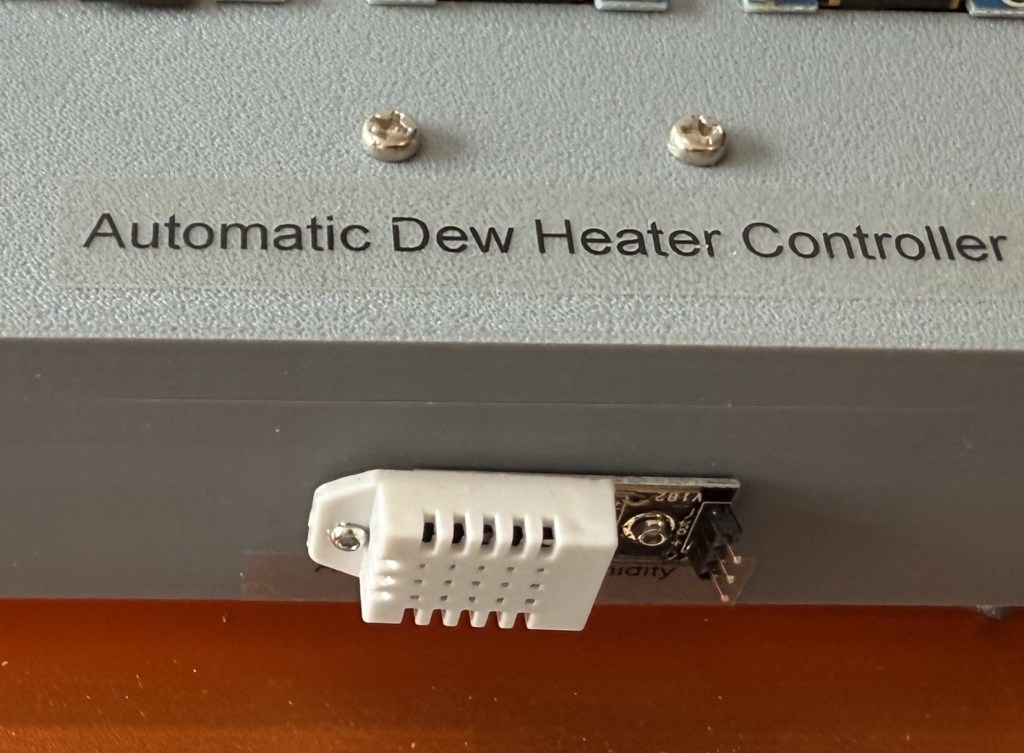
Temperature Humidity Sensor
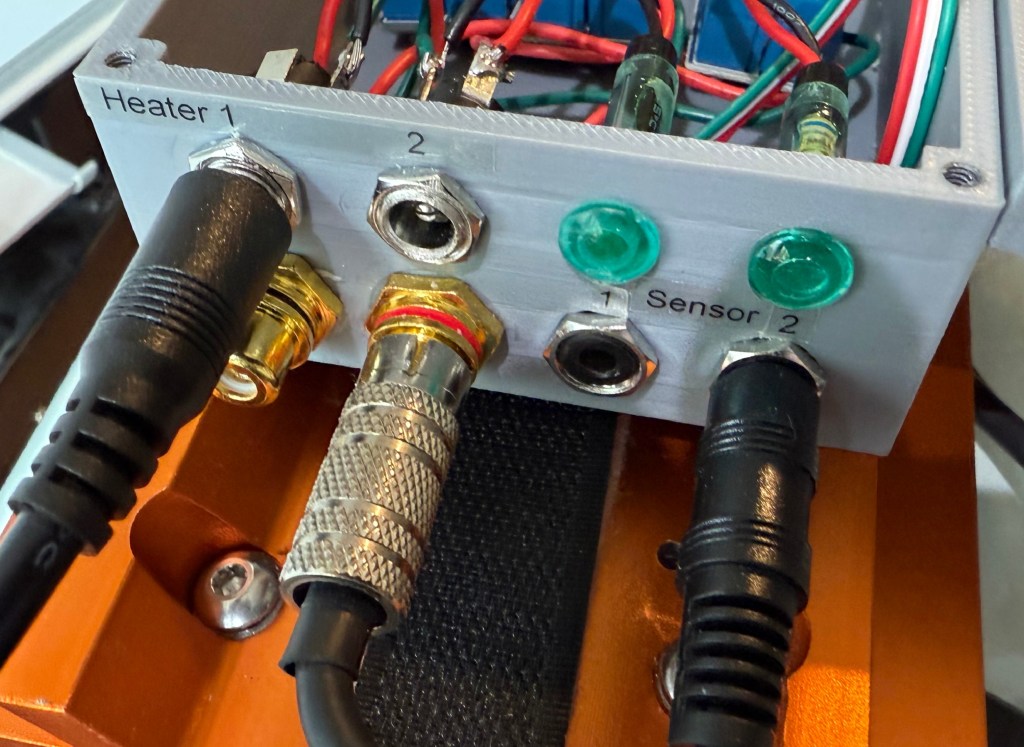
Exterior Connections
BOM
- Arduino Nano with pins
- Nano Breakout board – HiLetgo 5pcs Nano I/O Expansion Sensor Shield for Arduino UNO R1 Nano
- DHT22 Temp Humidity Sensor – Teyleten Robot DHT22 / AM2302 Digital Temperature Humidity Sensor Module for Arduino
- DS18B20 Temp Sensor – Diymore 10pcs DS18B20 18B20 TO-92 3 Pins Wire Digital Thermometer Temperature IC Sensor
- MOSFET driver – 12V, 5A or more – Teyleten Robot DC 5V-36V 15A Max 30A 400W Dual High-Power MOSFET Trigger Switch Drive Module 0-20KHz PWM Adjustment Electronic Switch Control Board
- Various power and Temp Sensor connectors
- Two 4.7K ohm resistors, 1/4 w
- 3 – 0.96″ OLED PI2C displays – 0.96 Inch OLED I2C IIC Display Module 12864 128×64 Pixel SSD1306 Mini Self-Luminous OLED Screen Board
- TCA9548A I2C IIC Multiplexer Breakout Board 8 Channel Expansion Board for Arduino
- Case
- Dew heater strips -12V
Table – Arduino Nano pin connections.
| Component Connection | Nano pin |
| Temp/Humidity Sensor pin | 2 |
| Temp Sensors | 3, 5 |
| MOSFET Drivers | 10, 11 |
| Display I2C Multiplexer | SLC, SDA, 5V, and Gnd |
Construction
Construction style is not critical. Any convenient plastic case would be suitable. I created a custom 3D printed case, with enough room for the components. The MOSFET drivers do not get hot or even warm during use. The Ambient Temp/Humidity sensor must be mounted on the outside of the case, away from any heat source. Convenient point to point wiring is suitable. The connectors should match your specific Dew heater straps.
The Temp sensors should be enclosed in heat shrink tubing along with the resistor.
Once complete no calibration is necessary. To test, just connect very thing and breathe on the Temp Humidity sensor. The heater should come on once the Dewpoint is raised sufficiently.
Note: turn off the power before connecting/disconnecting any of the cables.
